How to Make Smash Burgers: The Complete Guide to Crispy-Edged Smashburgers
A smash burger is not a thin hamburger. It's a different cook with a different goal: maximum crust. Everything about the technique, from how loosely you form the ball to when you season it, exists to get more browned surface per bite. Loose ball, screaming hot surface, smash once in the first thirty seconds, season after the smash, flip when the edges go lacy, and never press it again. Get the order right and a $4 patty tastes like a $16 one.
What's in this guide
- What actually makes a smash burger
- The meat: grind, fat and ball size
- Why grates don't work
- Getting the heat right
- The smash itself
- When to season, and why it matters
- The flip, the cheese and the timing
- Buns and the build order
- Burger sauce
- The Oklahoma onion smash
- Troubleshooting
- Smashburger recipes to cook next
- Questions we get asked
What actually makes a smash burger
When beef hits a hot surface, proteins and sugars react and produce hundreds of new flavor compounds. That's the Maillard reaction, and it's where almost all of a burger's flavor comes from. It only happens where the meat is in direct, dry contact with something hot.
A thick pub burger has a lot of interior and not much surface. A smashed patty flips that ratio. You take the same beef, flatten it to twice the diameter, and suddenly most of what you're eating is crust. That's the whole idea. Everything below is in service of it.
The whole guide in one line: Loose ball, screaming hot surface, smash once in the first thirty seconds, season after the smash, flip when the edges go lacy, and never press it again.
The meat: grind, fat and ball size
Fat content
Use 80/20 ground chuck. This is not a place to be healthy. The fat is what fries the patty against the surface and carries the flavor, and a smashed patty is thin enough that leaner beef goes dry before the crust forms. 85/15 works at a push. 90/10 will disappoint you.
If you grind your own, chuck alone is excellent. Chuck with a bit of brisket or short rib is better still.
Handle it as little as possible
Scoop the beef into loose balls and stop there. Do not roll them smooth, do not pack them, do not make neat pucks. Compressed meat smashes into a dense disc; a loose ball spreads into a patty with ragged, open edges, and those ragged edges are the crispiest part of the whole burger.
Ball size
| Ball weight | Smashed diameter | Best for |
|---|---|---|
| 2 oz | About 4 inches | Sliders, triples, a crowd |
| 2.5 to 3 oz | 4.5 to 5 inches | The sweet spot. Doubles. |
| 4 oz | 5.5 to 6 inches | Single-patty burgers. Harder to smash evenly. |
Two thin patties beat one thick one, every time. You get twice the crust and a place to put the cheese in the middle.
Cold beef
Keep the balls in the fridge until the moment they go on the heat. Cold beef holds together through the smash and gives the surface a head start on browning before the interior overcooks.
Why grates don't work
You cannot make a proper smash burger on grill grates. There's nothing to smash against, the patty sags between the bars, and the fat you need for frying drops into the fire.
What you need is a flat, heavy, solid surface:
- Flat top or griddle. The ideal. Big enough to do six at once and holds temperature when cold meat hits it. Our Smash Burgers on the Griddle recipe is built for exactly this setup.
- Cast iron skillet or griddle plate. Works perfectly, but you'll only fit two patties at a time, and the pan loses heat faster.
- Carbon steel pan. Heats faster than cast iron, nearly as good.
- A griddle plate set on your grill grates. The cheapest route to a real smash burger if you already own a grill.
Whatever you use, it needs enough mass to stay hot. A thin non-stick pan will drop temperature the second the beef lands, and you'll steam the patty instead of searing it. Browse our flat top griddle tools and accessories if you're setting one up.
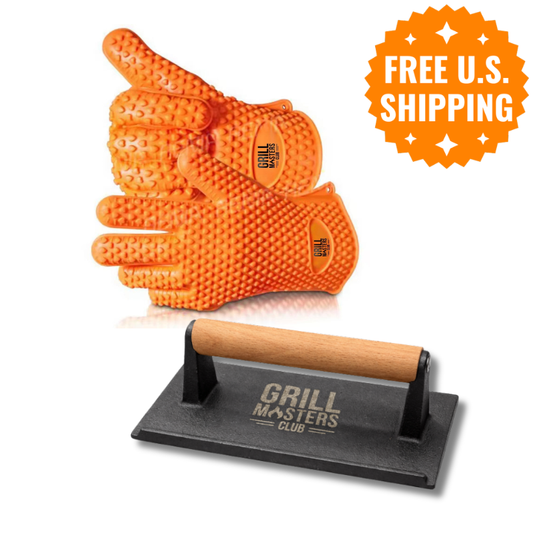
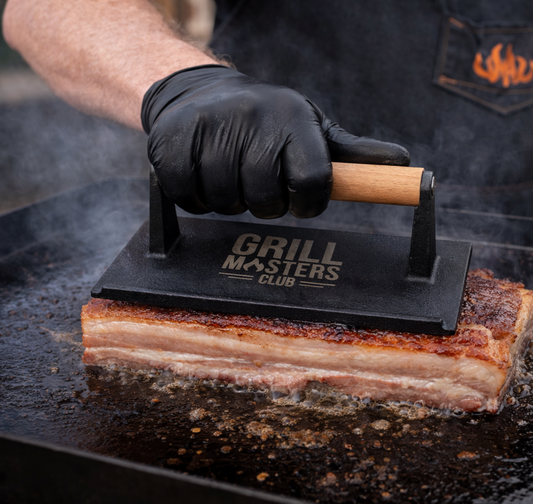
For the smash itself, a heavy flat burger press with a handle gives you far more control than a spatula. A spatula flexes, so the middle of the patty ends up thinner than the edges.
Getting the heat right
Hotter than you think. You want the surface at roughly 400°F to 450°F before the first ball goes down. On a flat top that's medium-high after a good ten-minute preheat. In cast iron, it's the point where a drop of water skitters across the surface instead of sitting and boiling.
Use a thin film of neutral oil with a high smoke point, or just beef tallow. A well seasoned surface barely needs it, since the patty releases its own fat within seconds.
The surface will cool when the cold beef lands. That's fine and expected. What you're avoiding is starting too low, because a patty that goes on at 300°F will render and grey rather than sear.
A word on smoke: This cook smokes. That's the fat hitting a hot surface, and it means you're doing it right. Cook outdoors or turn the extractor on before you start.
The smash itself
This is the part people overthink. It takes about ten seconds.
- Drop the ball on the hot surface. Leave plenty of room, because it's about to double in width.
- Smash within the first 30 seconds. This is the critical window. After 30 seconds the surface proteins have already set and the patty won't spread evenly.
- Press hard, straight down, and hold for about 10 seconds. Commit. A timid press gives you a thick burger with a weak crust.
- Lift the press cleanly. If the meat sticks, slide a square of parchment paper between the press and the patty before you smash. It peels off with no effort and takes nothing with it.
- Now leave it completely alone.
That last step is the one that gets broken. Every time you press a patty after the initial smash, you squeeze out rendered fat and juice. That liquid is your flavor and it does not come back.
How thin?
Roughly a quarter inch, with ragged edges thinner still. You should be able to see the texture of the grind. If you can see through it, you went too far and it'll tear on the flip.
When to season, and why it matters
Season after the smash, not before.
Salt draws moisture to the surface of meat. A ball salted five minutes before it hits the pan is a ball with a wet surface, and a wet surface steams instead of browning. Salt it on the griddle, right after you lift the press, and the seasoning sits on the crust rather than dissolving into it.
Season the second side after you flip, too. It's the same amount of seasoning split across two surfaces instead of one, and it tastes more even.
What to season with
Salt and pepper genuinely is enough. If you want more than that, keep it savory. Burgers are already sweet from the browning, and a sugary rub will burn on a 450°F surface.
| Seasoning | Why it works here |
|---|---|
| Perfect Burger Spice Blend by The Spice Guy | Savory and balanced, nothing competing with the beef. |
| Feiny's Feinburger & Steak Rub | Coarser grind, more black pepper. Good if you like a peppery edge. |
| Livia's Salt Pepper Garlic | The purist answer. Hard to beat and hard to get wrong. |
The flip, the cheese and the timing
Watch the edges, not the clock. When the outer rim of the patty goes lacy, dark brown and slightly crisp, and the top surface has lost its raw red, it's ready. That's usually 90 seconds to 2 minutes.
Flip with a stiff, thin metal turner. This matters more than it sounds. The crust is stuck to the surface, and that stuck crust is the best part. A flexible spatula will ride over the top and leave it behind. Get the edge underneath and scrape. A thin griddle spatula does this far better than a standard burger flipper.
The second side needs 45 to 60 seconds. That's all. The patty is a quarter inch thick. It's already nearly cooked. Overcooking side two is the most common way people ruin a good smash.
Cheese
Cheese goes on immediately after the flip so the residual heat melts it. American cheese is genuinely the right answer here, not an ironic one: it melts into a sauce rather than breaking into oil and curds. If you want more flavor, a slice of American plus a slice of sharp cheddar gives you both.
To force a proper melt, add a splash of water to the griddle away from the patty and cover with a basting dome for 20 seconds. The steam melts the cheese without further cooking the beef.
Stacking a double
Cheese on the first patty, then stack the second patty directly on top of it, then cheese again. The middle layer glues the two together and you get cheese in the center instead of just on top.
Doneness
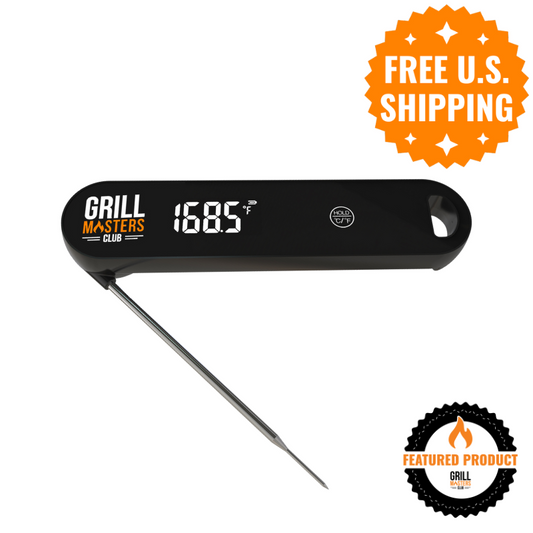
A smashed patty cooks through by the time the crust is right. There's no medium-rare option at a quarter inch, and that's fine, because the flavor is coming from the crust rather than the interior. Ground beef should reach 160°F for safety, which a properly smashed patty passes almost immediately. If you want to check, an instant read thermometer inserted sideways through the edge works.
Buns and the build order
Use a soft bun. Potato rolls are the standard for good reason: they're sturdy enough to hold together and soft enough not to fight the patty. Brioche works. A crusty artisan roll does not, because you'll squeeze the burger out the back on the first bite.
Toast the cut faces in butter on the same surface you cooked the patties on. Thirty seconds, until golden. This does two things: it tastes like the burger, and the toasted face waterproofs the bun against the sauce.
Build order, bottom to top
- Bottom bun, toasted
- Sauce
- Pickles
- Patty with cheese
- Second patty with cheese
- Onion
- More sauce
- Top bun, toasted
Lettuce and tomato are optional and, honestly, they work against you. Cold wet vegetables on a hot crisp patty soften the whole thing. If you want them, put them at the very bottom where they can't touch the meat.
Burger sauce
Nearly every great burger sauce is the same three ideas: something creamy, something tangy, something sharp. Mayo, a tomato or mustard element, and pickle.
A reliable starting ratio: 4 parts mayo, 2 parts ketchup, 1 part yellow mustard, 2 parts finely chopped pickle, plus a pinch of smoked paprika, garlic powder and a splash of the pickle brine. Adjust from there.
The shortcut most people miss is that a good Kansas City style BBQ sauce in place of the ketchup turns a standard burger sauce into something that tastes considerably more expensive. It brings smoke, molasses and vinegar all at once. Dixie Red BBQ Sauce by Old Southern BBQ is the one we build around in our Classic Bacon Smashburgers with Dixie Red Sauce. A dill pickle aioli does the same job from the other direction. For a pickle-forward take, try our Smokin' Smashburgers with Pickle BBQ Drizzle.
Make it ahead. Burger sauce is meaningfully better after an hour in the fridge, and much better the next day.
The Oklahoma onion smash
If you only take one extra technique from this guide, take this one. It costs nothing and it's the single biggest upgrade available.
- Slice a yellow onion paper thin on a mandoline. Thinner than you think is reasonable.
- Put the ball of beef on the hot surface and pile a generous handful of onion on top of it.
- Smash straight down through the onion, pressing it into the meat.
- Cook as normal. When you flip, the onions go face down onto the griddle and fry in the beef fat.
- Give them 45 seconds to go golden and sweet, then build the burger with the onion side up.
The onions steam into the patty from above while it sears from below, then caramelize when you flip. It's a Depression-era trick from Oklahoma for stretching expensive beef with cheap onion, and it accidentally produces a better burger than the beef alone. For another onion-loaded smash, try our Crispy Onion Smashburgers.
New to smashburgers? Our Smokin' Smashburger BBQ Box puts the press, the sauce and the rub in one box.
Everything for the cook, in one box
The Smokin' Smashburger BBQ Box
5.0 out of 5 from 11 reviews. 100% of buyers recommend it.
The Grill Masters Club burger press, an award-winning Kansas City style BBQ sauce for the burger sauce, a rub built for beef, a dill pickle aioli, a steak marinade, and a recipe card with two full smashburger builds and the pitmaster tips.
Free U.S. shipping. Cooking on a griddle? See our flat top collection.
Troubleshooting
| Problem | Cause | Fix next time |
|---|---|---|
| Grey patty, no crust | Surface wasn't hot enough | Preheat to 400°F to 450°F. Give cast iron a full 10 minutes. |
| Patty won't spread thin | Waited too long, or the ball was packed too tight | Smash within 30 seconds. Form loose balls, don't roll them. |
| Meat sticks to the press | No barrier, or the press is cold | Parchment square between press and patty. Preheat the press on the griddle. |
| Dry, tough burger | Pressed more than once, or overcooked side two | One smash only. Second side gets 45 to 60 seconds. |
| Crust stayed on the griddle | Flexible spatula rode over the top | Stiff thin metal turner. Get under it and scrape. |
| Patty fell apart on the flip | Smashed too thin, or too lean | 80/20 beef, quarter inch thick, not paper thin. |
| Soggy bun | Untoasted, or sauce sat too long | Toast the cut faces in butter. Build and serve immediately. |
| Cheese didn't melt | Second side cooks too fast to melt it passively | Splash of water and a basting dome for 20 seconds. |
| Burnt seasoning | Sugar in the rub at 450°F | Use a savory blend. Save the sweet stuff for low and slow. |
Smashburger recipes to cook next
Put the guide to work with one of these.
Grill Masters Club smashburger recipes
Questions we get asked
What's the difference between a smash burger and a regular burger?
A regular burger is formed into a patty before cooking and treated gently to keep it juicy. A smash burger starts as a loose ball and gets flattened hard against a hot surface so that most of the patty becomes crust. The goal is browning, not thickness.
How long do you cook a smash burger?
About 90 seconds to 2 minutes on the first side, until the edges go lacy and dark brown, then 45 to 60 seconds on the second. A quarter-inch patty cooks through in that time.
Do I need a burger press?
No, but it helps a lot. A heavy flat press applies even pressure across the whole patty. A spatula flexes in the middle, so the patty ends up thick in the center and thin at the edges. A sturdy metal spatula weighted with a second pan works in a pinch.
Why do you season after smashing instead of before?
Salt draws moisture to the surface, and a wet surface steams rather than browns. Seasoning on the griddle right after the smash keeps the surface dry at the moment browning starts, and leaves the seasoning sitting on the crust.
What ground beef is best for smash burgers?
80/20 ground chuck. The fat fries the patty against the surface and keeps a thin patty from drying out. Leaner than 85/15 and the result gets dry and crumbly.
Can I make smash burgers on a grill?
Not directly on the grates, no. There's nothing solid to smash against and the fat drips into the fire. Put a cast iron griddle plate or a flat top insert on the grates and you get the real thing.
Why does my smash burger stick to the press?
Usually because the press is cold or there's no barrier. Preheat the press on the griddle for a minute, and put a small square of parchment paper between the press and the patty. It lifts off clean every time.
Should smash burgers be one patty or two?
Two thinner patties beat one thicker one. You double the amount of crust and get a layer of cheese in the middle instead of only on top. Two 2.5-ounce balls is the sweet spot.
What is an Oklahoma onion burger?
A smash burger with a handful of paper-thin sliced onion pressed into the patty during the smash. The onion steams into the meat, then caramelizes on the griddle when you flip it. It started as a way to stretch beef and ended up being an upgrade.
Join 100,000+ Grill Masters
Get weekly recipes, pro tips, and exclusive deals sent straight to your inbox. Plus your free Pit Card download and 10% off your first order.