

Bobby T's Perfect Pizza Dough: 24 Hour Cold Ferment Method
The 24 hour cold ferment is the easiest upgrade in pizza. You mix the dough a day ahead, put it in the fridge, and time does the work. The crust comes out more flavorful, more bubbly and easier to stretch, and it browns better on the grill. This is Pitmaster Bob Trudnak's method, and the step-by-step recipe card is below. This guide explains why it works and how to get it right every time.
Quick answer: mix your dough, cover it and refrigerate it for 24 hours. Then divide it into balls, dust with semolina, and proof covered at room temperature for 4 to 5 hours before stretching. The slow, cold rest builds flavor and makes the dough stretch without fighting back.
Why cold fermenting works
Pizza dough is flour, water, salt and yeast. What happens after you mix it decides how good the crust is.
- Flavor. At room temperature, yeast works fast and mostly makes gas. In the fridge it slows way down, which gives the yeast and the natural enzymes in flour time to build the flavor compounds that make bakery bread taste like more than flour.
- Browning. Enzymes in the flour break some starch into simple sugars during the long rest. More available sugar means the crust browns and blisters faster on a hot grill, before the inside dries out.
- Stretch. Gluten relaxes during the long rest. A cold fermented dough ball stretches out thin without snapping back, which matters when you're shaping on a peel next to a hot fire.
- Bubbles. Slow gas production creates an open, airy structure with big bubbles in the rim.
- Your schedule. You mix on Friday, cook on Saturday. All the hands-on work takes about 20 minutes.
Choosing your flour
| Flour | What it gives you | Best for |
|---|---|---|
| Bread flour | Higher protein, strong and chewy, holds its shape | Grilling directly on the grates, New York style |
| Italian 00 flour | Finely milled, soft and tender, very extensible | Stones and pizza ovens. Can be soft for direct grilling |
| All-purpose flour | Middle ground, a little less chew | Works fine if it's what you have |
| Semolina | Coarse, gritty | Dusting the dough balls and the peel so pizzas slide |
For grilling, bread flour is the forgiving choice. A stronger dough is less likely to sag through the grates.
Grams and hydration
Using a mix? Follow the recipe card below. Making the dough from scratch? This is a simple starting formula for two to three 12 inch pizzas. Weigh everything, since cups of flour can vary a lot.
| Ingredient | Weight | Baker's percent |
|---|---|---|
| Bread flour | 500 g | 100% |
| Cool water | 325 g | 65% |
| Fine sea salt | 12 g | 2.4% |
| Instant yeast | 2 g (about 2/3 tsp) | 0.4% |
| Olive oil (optional) | 10 g | 2% |
What hydration means: it's the water weight divided by the flour weight. 325 g of water on 500 g of flour is 65% hydration. Around 60 to 65% is easy to handle and great for the grill. Going up to 68 to 70% gives a more open, airy crust but a stickier dough that's better suited to a stone. If you're new to it, start at 62 to 65%.
Use cool water, not warm. The dough is going into the fridge for a long, slow rise, and you don't want the yeast racing ahead before it gets cold.
Cold ferment timeline
| When | Step | Time |
|---|---|---|
| Day 1, evening | Mix and knead until smooth | About 10 minutes by hand, 4 to 6 in a mixer |
| Day 1 | Cover and refrigerate | 24 hours |
| Day 2, early afternoon | Divide, shape into balls, dust with semolina, cover | 10 minutes |
| Day 2, afternoon | Proof at room temperature | 4 to 5 hours, until soft and puffy |
| Day 2, 30 minutes before dinner | Fire up the grill | 15 to 30 minutes |
| Day 2, dinner | Stretch, top and grill | 5 to 12 minutes per pizza |
Want to eat at 6 PM? Pull the dough from the fridge and ball it around 1 PM.
24 vs 48 vs 72 hours
- 24 hours: the best balance. Much better flavor and stretch than same-day dough, and still strong enough for the grill.
- 48 hours: deeper flavor, a little more tang, browns faster. A great middle ground if your plans slip a day.
- 72 hours: the most complex and sour flavor, the most blistering. The dough gets softer and slacker, so it's better on a stone than directly on the grates. Keep an eye on the bottom, since more sugar means it burns faster.
- Past 3 days: most yeasted doughs start to over-ferment, turning weak, sticky and boozy smelling.
Short on time? Our same day method works too, with a little less flavor.
Freezing cold fermented dough
- Finish the cold ferment, then divide and shape into balls.
- Rub each ball with a little oil and wrap it tightly, or put it in its own freezer bag with the air pressed out.
- Freeze for up to about 3 months for the best texture.
- Thaw overnight in the fridge, then proof covered at room temperature for 3 to 5 hours before stretching.
Freeze after fermenting, not before. The flavor is already built, and frozen dough doesn't keep fermenting.
Troubleshooting
| Problem | Likely cause | Fix |
|---|---|---|
| Dough snaps back when stretched | Too cold or not rested enough | Cover and wait 15 to 20 minutes, then try again |
| Dough tears easily | Underproofed, under-kneaded or very soft flour | Longer room temp proof, knead a little longer, try bread flour |
| Dough didn't rise in the fridge | Old yeast, or the fridge is very cold | Check the yeast date. Some rise is slow in the fridge. The real rise happens during the room temp proof |
| Dough is sticky and slack | Over-fermented or hydration too high | Shorter ferment, or drop the water by 10 to 15 g |
| Crust is dense | Underproofed after balling | Let the balls proof until puffy and soft |
| Bottom burns before top cooks | Grill too hot, long-fermented dough browns fast | Two-zone setup, finish on the cool side with the lid closed |
| Pizza sticks to the peel | Not enough dusting | Use semolina generously and shake before launching |
Taking it to the grill
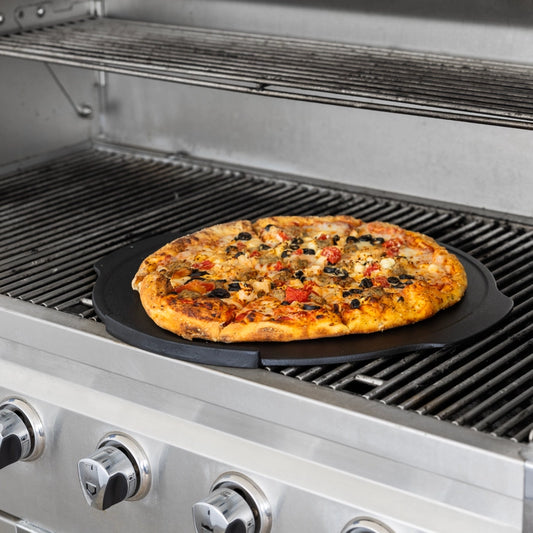
Once the dough is proofed, you can cook it straight on the grates or on a cast iron stone. Our full guide, How to Grill Pizza, covers the two-zone setup, timing and toppings.

Want a dough made for the grill with no planning? The Pitmaster's Grilled Pizza Kit includes Urban Slicer Pizza Worx Outdoor Grilling Pizza Dough, which makes two crusts of about 14 inches, plus cupping pepperoni, pizza sauce and two Mojo seasonings. Follow the package directions for that dough. Find stones, peels and more in our backyard pizza essentials.

Gear up for grilled pizza: the Outset 18" Cast Iron Pizza Stone (free cutter included) and the 10x18" Bamboo Pizza Peel. Take 10% off with code USA, and US orders of $100 or more ship free.
Frequently asked questions
How long can pizza dough cold ferment?
About 24 to 72 hours in the fridge for most yeasted doughs. 24 hours gives a big jump in flavor and texture. Past about 3 days the dough can turn slack and overly sour.
Is 24 hour or 72 hour cold ferment better?
24 hours is the sweet spot for most home cooks: better flavor, easier stretching and blistered crust, with less planning. 72 hours is more complex and tangy and browns faster, but the dough is softer and harder to handle on a grill.
Do you need to let cold fermented dough come to room temperature?
Yes. Shape the dough into balls and let them proof covered at room temperature for about 3 to 5 hours, until soft and puffy. Cold dough snaps back and will not stretch.
Can you freeze cold fermented pizza dough?
Yes. After the cold ferment, shape it into balls, oil them lightly, wrap tightly and freeze. Thaw overnight in the fridge, then proof at room temperature before stretching.
What flour is best for cold ferment pizza dough?
Bread flour is the easiest choice for grilling, since its higher protein gives a strong, chewy dough that holds up on the grates. Italian 00 flour gives a softer, more tender crust and works best on a stone.
Why does my cold fermented dough tear or snap back?
Tearing usually means it is underproofed or too cold, or the gluten is weak. Snap back means it needs more rest. Cover it and wait 15 to 20 minutes, then stretch again.

Keep pizza night interesting
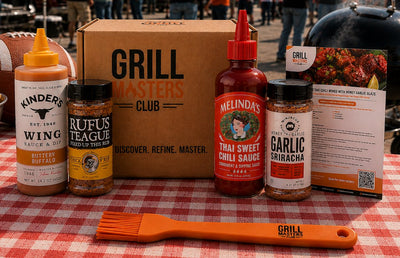
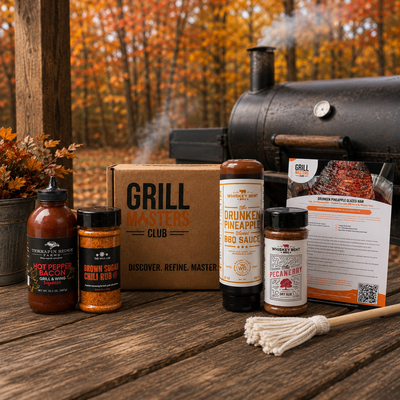
A new sauce or rub turns the same pie into a whole new dinner. With a Grill Masters Club subscription, a themed box of pitmaster-picked sauces, rubs and a tool shows up every 2 or 3 months, with a recipe booklet built around exactly what's inside. No theme ever repeats.
Start your subscriptionFree US shipping. Shopping for the griller in your life? Give the Gift of BBQ.

24 hours
Learn how to prepare your Bobby T's Perfect Pizza Dough Mix with the 24 hour cold ferment method.
Directions
Start by emptying the contents of Bobby T’s Perfect Pizza Dough into a large mixing bowl. Add 290 grams (approx. 10 oz) of cool water.
Combine the mixture well. You can do this by hand for 7-10 minutes, or with a mixer using a dough hook attachment for 4-6 minutes on low speed, until fully mixed.
Place your perfect pizza dough in a covered container or in a dough box with a lid. Let your dough refrigerate for 24 hours to cold ferment. This will ensure your pizza crust ends up with that bubbly, elastic texture you want. It will be worth the wait.
After 24 hours of cold fermentation, prep a clean, dry surface with a coating of flour. With floured hands, remove the fermented dough from its covered container and place it on your prepped surface.
Using a dough knife, cut your Perfect Pizza Dough into 2 or 3 equal sections. (That will determine the size your finished pizza crusts will be.) Then form and shape each of your sections into nice round dough balls.
Next you’ll dust the formed dough balls with Semolina flour and place them in a covered container or dough proofing box once more, 6 inches apart.
Allow the dough balls to proof for another 4-5 hours at room temperature. Make sure they’re covered.
Here’s where it gets interesting. Coat your hands and work surface with flour and begin to stretch the dough balls to form your pizza crust. You’ll feel like an authentic Italian pizzaiolo.
The time has arrived to top your Perfect Pizza Dough with Bobby T’s Pizza Sauce, Bobby T’s Pizza Topping, and your favorite toppings.
Join 100,000+ Grill Masters
Get weekly recipes, pro tips, and exclusive deals sent straight to your inbox. Plus your free Pit Card download and 10% off your first order.